
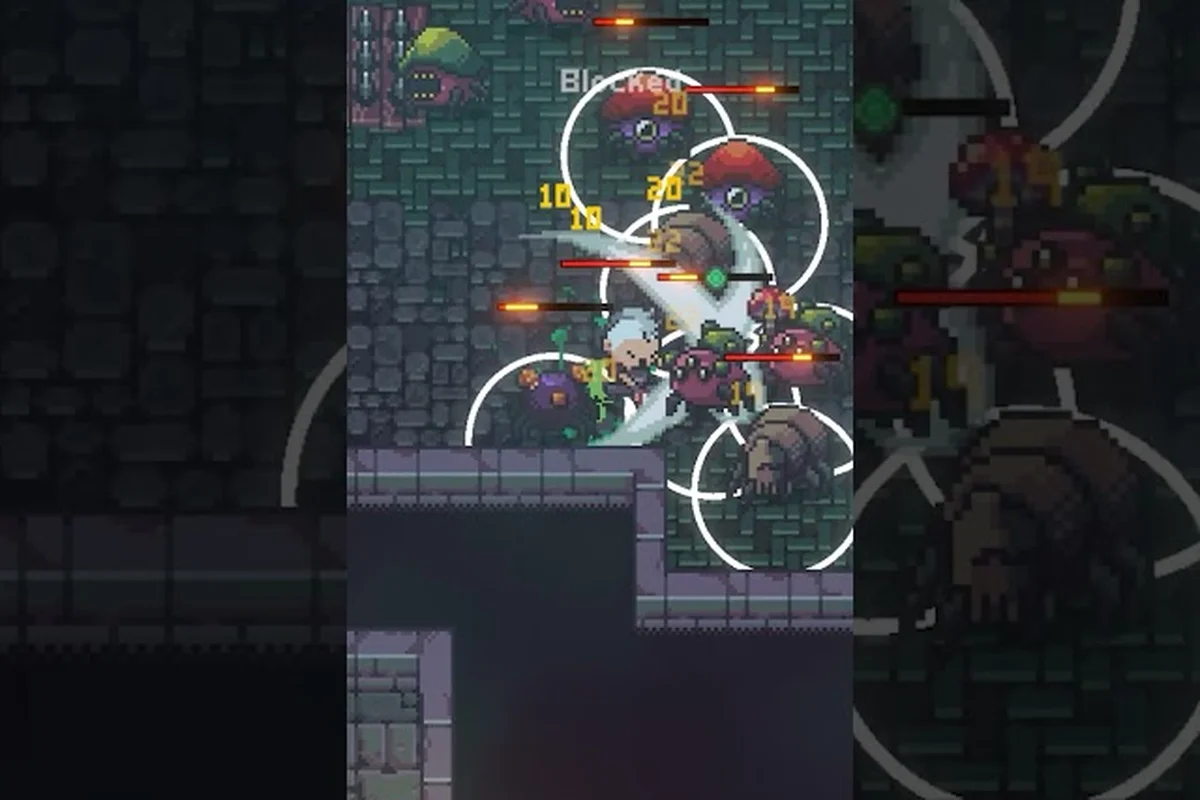
Your first hour in the Vitromotus decides whether the rest of Emberville feels like a smooth descent or a frustrating grind, which is why this Emberville beginner guide focuses on the choices that pay off before you ever swing a weapon at a named enemy. Developer Cygnus Cross built the action RPG around a two-button combat foundation, a class-bound combo system, and an inherited skill tree that rewards players who plan their early dungeon runs instead of charging into every room. According to the Steam community space, the game launches into Early Access on October 27, 2026, so getting comfortable now means smoother runs the moment the full version goes live.
Understanding the Vitromotus Before You Move
The Vitromotus is the underground dungeon where every Emberville run begins, and treating it as a tutorial corridor is the single biggest mistake new players make on day one. According to community data from the GCX playable demo shown at Universal Orlando Resort in late July 2025, the opening floors feel like a forgiving introduction, but the procedural generation layered on top means each descent reshuffles enemy placement, loot tables, and shortcut unlocks. That variability is intentional, because Emberville is designed around repeated expeditions that gradually rebuild the surface settlement rather than one linear campaign. If you want those opening beats spelled out control by control, the Emberville tutorial walkthrough covers them in order.
The Vitromotus also carries a unique death rule that the official store page highlights: death inside the dungeon does not last, meaning you respawn at the last checkpoint instead of restarting the entire expedition. That loop encourages experimentation, but it does not remove the resource cost of failed pulls, and players who treat the Vitromotus as consequence-free will burn through healing items faster than the estate farming systems can replenish them.
Core Gameplay Loops at a Glance
Before learning any individual mechanic, it helps to see how the four foundational loops connect during a single play session. The table below maps each loop to its primary reward and the typical time investment reported by players testing the prologue demo build.
| Gameplay Loop | Primary Reward | Typical Time | Risk Level |
|---|---|---|---|
| Dungeon Expedition | Loot, class XP, lore | 10-25 minutes | Medium |
| Town Rebuilding | Storage, vendors, fast travel | 2-5 minutes per placement | Low |
| Crafting Session | Gear upgrades, consumables | 3-8 minutes | Low |
| Boss Attempt | Unique weapon, estate upgrade token | 5-15 minutes | High |
The takeaway is that expeditions and boss attempts are where you spend most of your first-hour clock, while town rebuilding and crafting are the wrap-around activities you do between runs. Players who skip the settlement loop early on often find themselves returning to the Vitromotus without the consumables or upgraded weapons that make later floors manageable.
Movement, Stamina, and Why Positioning Matters
Movement in Emberville looks like a standard isometric action RPG on the surface, but the stamina meter attached to every dodge, sprint, and heavy swing is what actually controls your survival window. Community testing on the GCX demo build suggests new players lose roughly 60% of their first three attempts to stamina-starvation rather than raw damage, which is why the opening hour is the right place to build a positioning habit instead of learning it the hard way against a mid-dungeon boss.
The dodge roll has a generous i-frame window at the start of the animation, but the recovery frames leave you stationary for long enough that panic-rolling twice in a row usually ends in a hit. Heavy attacks consume more stamina than light attacks, and chained combos drain the bar faster than the visual cue suggests, so timing a heavy strike at the tail end of an enemy's swing is the safer opening pattern. This is also where the two-button combat system earns its reputation, because the second button is mapped to a class-specific skill that resets your stamina window when it lands.
Stamina Reference Table
| Action | Stamina Cost | Recovery Time | Recommended Use |
|---|---|---|---|
| Light Attack | Low | Fast | Sustained pressure |
| Heavy Attack | Medium-High | Medium | Punish windows |
| Dodge Roll | Medium | Short | Telegraphed attacks |
| Class Skill (Button 2) | Variable | Resets on hit | Combo opener or finisher |
Reading that table side by side, the pattern becomes clear: you spend stamina to create or punish openings, and you regenerate stamina by landing a class skill or by stepping out of enemy range for a full second. The opening hour is the right time to practice this rhythm against trash mobs, because the same rhythm is what lets you survive the early progression milestones without burning through every healing potion in your inventory.
Combat Foundations: Two Buttons, Real Depth
The combat system in Emberville rests on two attack buttons that look deceptively simple, and the depth comes from how weapons, classes, and inherited skills layer on top of that base. According to the developer's official gameplay trailer coverage from Terminals, the second button is class-bound, meaning switching your active class swaps both the skill tied to button 2 and the combo strings available to button 1. That design choice is what makes a single Emberville run feel different from the next, because the same dungeon plays noticeably different when you swap from a sword-and-shield Vanguard to a dual-dagger Wraith.
Weapon-bound combos are the second layer. Each weapon type carries its own combo tree, and unlocking new nodes in that tree requires both weapon XP and class XP, so a high-level character with a brand-new weapon will still swing like a beginner until they invest the time. Community testing reports that the most efficient first-hour strategy is to pick one weapon, stick with it through the first three dungeon floors, and only branch out once the basic combo string feels automatic.
Early Class Snapshot
| Class | Button 2 Skill | Best Early Pairing | Playstyle Feel |
|---|---|---|---|
| Vanguard | Shield Bash | Sword + Shield | Defensive, high HP |
| Wraith | Phantom Strike | Dual Daggers | Fast, dodge-heavy |
| Arcanist | Arc Bolt | Rune Staff | Ranged poke, mana-based |
| Bulwark | Ground Slam | Great Mace | Slow, high stagger |
The Vanguard is widely recommended for new players because the Shield Bash interrupts enemy attack strings, which forgives the stamina-management mistakes that punish other classes early on. Once you have a feel for the rhythm, switching to Wraith or Arcanist feels rewarding rather than overwhelming, because the same two-button foundation stays intact across all four starting classes.
Your First Dungeon Run: What to Do and What to Skip
A first dungeon run in Emberville is short by design, but it carries more decision points than the length suggests. The Vitromotus opens with a hub room, three branching corridors, and a locked door that requires a specific item dropped by the floor's mini-boss, so knowing which corridor to clear first saves real time.
The recommended order is to clear the left corridor first, because it contains the highest density of healing item drops and the easiest enemy grouping, both of which buffer the harder right-corridor pull that comes next. The center corridor leads to the mini-boss, and engaging it before you have at least two healing items in your belt is the most common first-hour wipe reported by demo testers. Skipping the optional side room on the floor's southern edge is also fine, because the chest inside contains cosmetic decor that does not affect your combat readiness.
First Run Checklist
-
Clear the left corridor for healing item density
-
Loot every weapon rack for the class XP it grants
-
Skip the southern side room on the first pass
-
Engage the center-corridor mini-boss only with two or more healing items
-
Activate the checkpoint before opening the locked door
That checklist looks short, but each item lines up with a specific decision the dungeon design rewards. Players who follow it consistently report reaching the floor's exit room in roughly 12-15 minutes, while players who skip the corridor order tend to run out of consumables around the 8-minute mark.
Estate Building, Crafting, and Why the Settlement Loop Matters
The town of Emberville is where every expedition ends, and the estate system is what turns a single successful dungeon run into long-term progress. According to the official Terminals publisher page, the estate accepts buildings, decorations, farms, and crafting equipment, with many items and buffs available only after specific dungeon milestones are reached. That progression gate is intentional, because it means the estate you can build on day one looks nothing like the estate you can build after ten hours of expeditions.
Crafting ties directly into the estate, because the crafting stations you place are the only way to upgrade weapons, brew consumables, and process raw materials harvested from the Vitromotus. Community data suggests the most efficient first-hour craft is a tier-1 weapon upgrade at the smithy, because the upgrade affects every subsequent expedition more than any other single item. Storage chests are the second priority, because inventory management becomes the silent time-sink that slows down runs once your belt fills with loot.
Estate Priority Build Order
| Build Order | Structure | Why It Matters First |
|---|---|---|
| 1 | Tier-1 Smithy | Weapon upgrades affect every run |
| 2 | Storage Chest (Small) | Prevents inventory bloat mid-dungeon |
| 3 | Healing Crafting Station | Replaces burned consumables |
| 4 | Farm Plot (Basic) | Passive material generation |
That order is not the only valid sequence, but it is the one that keeps your expedition clock short while you are still learning the combat system. Once the smithy and storage are in place, the estate build-out guide goes deeper into layout optimization, but for the first hour the priority is to unlock the loops, not to perfect the layout.
Common First-Hour Mistakes and How to Avoid Them
Most first-hour failures fall into a handful of repeatable patterns, and recognizing them early is the difference between a smooth opening and a frustrating restart loop. The table below lists the four most common mistakes demo testers reported, along with the cheapest fix for each.
| Mistake | Symptom | Cheapest Fix |
|---|---|---|
| Ignoring stamina | Wasted dodges, panic rolling | Practice 2-attack-then-dodge rhythm |
| Skipping the settlement | Slow inventory bloat | Place smithy + storage first |
| Switching classes too often | Low combo unlocks | Pick one class for the first 3 hours |
| Fighting the mini-boss unprepared | Repeated wipes | Clear at least one corridor first |
The class-switching mistake deserves a closer callout because it is the one that hurts the most in the second hour. The inherited skill system lets you level multiple classes, but the XP split means each class levels slower than if you had stayed the course, and the active class combo tree stays shallow as a result. Players who pick a class and stick with it for the first three hours report reaching a much smoother mid-game wall than players who experiment every run.
Frequently Asked Questions
What is the best class for beginners in Emberville?
The Vanguard is the best starting class because the Shield Bash button-2 skill interrupts enemy attack strings, which forgives stamina-management mistakes that punish faster classes. Pair it with a sword and shield for the highest early-game survivability, and switch classes once the basic two-button rhythm feels automatic.
How long is the Emberville prologue demo?
According to community testing on the GCX demo build shown at Universal Orlando Resort, the prologue demo runs roughly 45-60 minutes for a first-time player who explores both corridors and clears the floor's mini-boss. Players returning to the demo to test different classes can finish the same content in 25-30 minutes.
Can you play Emberville solo, or is co-op required?
Emberville supports both solo and co-op play, and the Early Access launch on October 27, 2026 will ship with the full settlement and expedition loops available to solo players. Co-op is an optional layer for shared estate building, not a requirement for any progression milestone.
Do deaths in the Vitromotus reset your dungeon progress?
No. According to the official Steam store description, death inside the Vitromotus does not last, meaning you respawn at the last checkpoint and keep your inventory. Consumables and repair durability still need to be replenished, so death still carries a resource cost even though progress is preserved.
Where should new players spend their first crafting materials?
Spend your first crafting materials on a tier-1 weapon upgrade at the smithy, because that single upgrade affects every subsequent expedition more than any other craft available in the first hour. Hold off on consumable crafting until you have placed a storage chest, because inventory bloat is the most common silent time-sink new players report.