
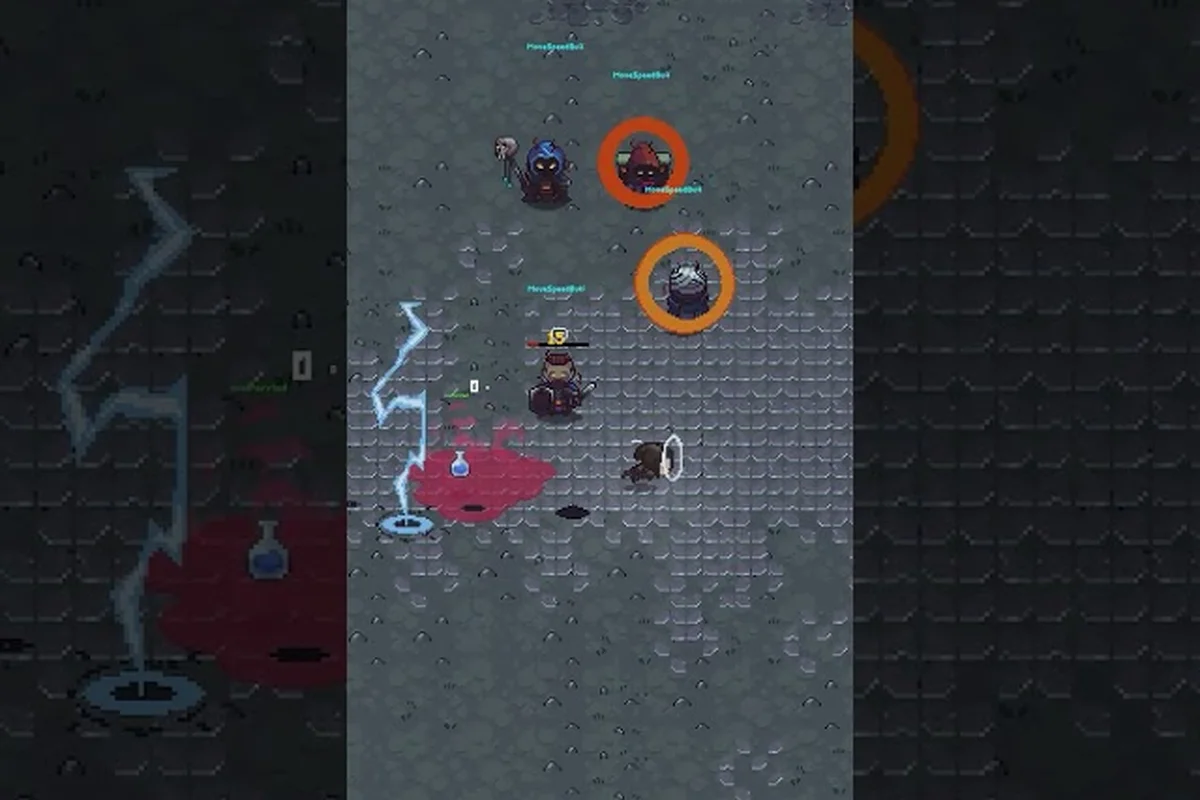
Knowing when to raise your guard is the single biggest survival lever in any Vitromotus expedition, and this Emberville blocking guide breaks down exactly how the parry-and-block layer of the two-button combat system works in practice. The block input sits on the secondary face button, so the timing window matters more than the button itself: tap it too early and the enemy simply walks around your shield, tap it too late and the hit connects full-force before your guard is up. According to the demo announcement, the game is built on a two-button combat system that pairs weapon-bound combos with class skills, which means the defensive layer has to coexist with aggressive chaining rather than replace it.
This guide covers the timing rules, chip damage math, guard break telegraphs, and positioning habits that turn blocking from a panic button into a deliberate tool. You will also see how blocking feeds directly into Emberville how to combo follow-ups, because every successful block creates a small opening window for your next swing. Treat the block as the backbone of your defense, not a fallback, and the rest of combat starts to feel readable.
The Core Block Window and Why Early Taps Fail
How the Block Input Actually Registers
The block command reads input on a short window relative to the enemy's attack windup, not the moment their weapon begins moving. Community testing on the GCX demo build suggests the block buffer is roughly 6 frames (about 0.1 seconds at 60fps) before impact, and a clean block consumes a sliver of stamina rather than negating the hit entirely. If you tap the block button the instant you see the enemy start its animation, you are usually too early, because the engine has not yet classified the attack as active and the guard input is treated as an idle pose.
The practical fix is to wait for the swing, thrust, or lunge to commit, then raise your guard as the weapon or limb enters the final third of its travel. That "late-but-not-too-late" rhythm is what most players settle into after a handful of dungeon runs. Pairing that rhythm with an awareness of the two-button combat flow keeps your fingers from overcommitting to defense while the enemy is still in its telegraph phase.
Chip Damage, Stamina Burn, and Why Blocking Is Not Free
A successful block does not zero out incoming damage; it cuts it by a set multiplier and bleeds part of the hit through as Chip Damage. Based on community data from the July 2025 demo, chip values look roughly like this across the weapon classes players had access to:
| Enemy Attack Type | Raw Damage | Blocked Damage (Chip) | Stamina Cost |
|---|---|---|---|
| Light melee swing | 12 | 3 | 4 |
| Heavy overhead | 28 | 9 | 10 |
| Thrust / lunge | 16 | 5 | 6 |
| AoE slam (boss) | 40 | 18 | 14 |
| Projectile volley | 8 per bolt | 2 per bolt | 3 per bolt |
Chip damage scales loosely with the raw hit, so blocking a boss slam still stings even when the guard holds. Stamina is the real gatekeeper: drain it completely and the next hit will land as if you had never blocked, which is why mash-blocking through an extended combo is a reliable way to die. The Emberville combat guide walks through how stamina regen works during the post-attack pause, which pairs naturally with everything below.
Reading Enemy Telegraphs Before You Block
Standard Enemy Windup Patterns
Most Vitromotus enemies use one of three telegraph families, and each has a different block timing attached. Light enemies favor quick jabs with a half-second windup, mid-tier bruisers use a shoulder dip before a heavy swing, and ranged threats spend their telegraph charging a glowing projectile that you can either sidestep or block once it leaves the hand. The pattern matters because the block window shifts slightly with each family.
| Telegraph Family | Visual Cue | Window Length | Recommended Block Timing |
|---|---|---|---|
| Quick jab | Flick of the front arm | ~0.35s | Block at the moment the arm extends |
| Shoulder dip | Hunched drop on the lead shoulder | ~0.7s | Block at the apex of the dip, not the swing start |
| Charge-up shot | Glow at the weapon tip or palm | ~0.9s | Block as the projectile releases; sidestepping is also valid |
| Boss AoE tell | Ground crack or screen-edge flash | ~1.2s | Back off first, block only as the wave reaches you |
Learning to read these telegraphs is the practical answer to emberville attack timing questions, because the visual cue tells you which timing family you are dealing with before the swing resolves. Players who map each enemy archetype to one of the rows above tend to halve their block-fail rate within an hour of practice, according to community reports from the Emberville Discord.
Guard Break Signals and Unblockable Strikes
Some attacks are designed to bypass the block input entirely, and learning to spot them is what separates mid-level explorers from the players who clear the deeper Vitromotus floors. Guard Break strikes glow a distinct color during their telegraph, play a louder sting on the audio layer, and typically come from enemies that have spent three or more seconds winding up. The block input will visually trigger, but the engine treats the hit as unblockable and applies the full damage value.
The defensive answer to a guard break is not blocking; it is positioning. Sidestep the hit, use a mobility skill if your class has one, or interrupt the windup with a fast combo from Emberville how to combo inputs. The Emberville weapon bound combos guide is worth bookmarking for the interrupt windows on faster weapons, since a well-timed light-light-heavy string can cancel a guard break telegraph before the strike resolves.
Emberville Positioning Guide: Where You Stand Changes What You Can Block
Holding the Midline vs. Cornering Yourself
A common beginner mistake is to backpedal against a wall the moment a fight starts, because the wall feels like safety. In practice, the wall removes your sidestep vector and turns every guard break into a free hit on you. The emberville positioning guide mindset is the opposite: stand at roughly mid-range, keep one sidestep lane open at all times, and let the enemy commit to its swing before you decide whether to block or step.
The mid-range stance also feeds your offense, because the post-block opening window is longest when the enemy has to close the gap before its next swing. Holding too far back forces enemies to recover and re-telegraph, which feels safe but extends every fight and burns through your healing charges. Standing too close crowds your block input against the screen edge and makes the timing window harder to read.
Distance Bands and the Block Decision
Different distance bands favor different defensive answers, and learning to swap between them mid-fight is one of the emberville combat mechanics most players overlook. A short cheat sheet:
| Distance Band | Defensive Default | When to Break the Rule |
|---|---|---|
| Out of melee range | Dodge projectiles, close the gap with a dash skill | Block only if a volley is mid-flight and you have no dash |
| Mid-range (1-2 enemy steps) | Block standard swings, sidestep heavies | Punish after a successful block with a light combo |
| Point-blank | Block and push away, do not commit to combos | Use a push skill to reset the mid-range band |
| Cornered (wall at your back) | Burst out with a mobility skill | Avoid this band entirely; treat it as a positioning failure |
Players who internalize the four bands report that fights start to feel scripted, because the defensive answer is already chosen before the enemy's animation begins. That scripting is what the positioning guide is really selling: not fancy footwork, but choosing the distance that makes the block input land correctly.
Emberville Two Button Combat: Weaving Block Into Your Combo Strings
Post-Block Openings and Combo Extensions
The two-button combat system pairs one attack button with one block button, and the developers at Cygnus Cross designed the system so that a successful block briefly extends the combo timer on the attack side. A blocked light swing hands you roughly a 0.4-second window to land a counter, while a blocked heavy gives closer to 0.7 seconds because the enemy stumbles further back. That is the technical answer to emberville how to combo follow-ups after defending, and it is the bridge between this guide and the offense-focused articles.
The simplest chaining rhythm looks like this:
-
Block a light swing, then tap attack twice for a quick punish string.
-
Block a heavy swing, then input light-light-heavy for a fuller combo.
-
Block a projectile, then dash in and chain a full three-hit string before the enemy recovers.
Each pattern rewards a different timing feel, and the rhythm you build around your most-used weapon determines which pattern becomes muscle memory. Players who swap weapons often usually settle on the light-punish pattern because it works across the entire weapon roster, while sword and axe specialists tend to prefer the heavy-counter extension because their weapons trade the extra recovery for raw damage.
Defending During a Combo Without Dropping the String
One of the trickier emberville combat mechanics is interrupting your own combo with a block and then resuming the string, rather than letting the combo timer expire. The system allows it as long as the block lands cleanly and the next attack input arrives within the extended window, so the practical habit is to hold the combo timer mentally even while defending. This is also where the emberville blocking guide meets the emberville how to combo guide, because a defensive player who never chains is leaving a lot of damage on the table.
The Emberville how to block question therefore has a second half: blocking well is only half the skill; restarting your combo inside the post-block window is the other half. Most players in the GCX demo build who cleared the first boss used exactly that pattern, blocking two or three times during the fight and converting each successful guard into a partial combo extension. According to community data shared after the GCX showcase, that approach cuts the fight length by roughly 30-40% compared with players who either block passively or never block at all.
Advanced Guard Habits and Common Blocking Mistakes
Habits That Separate Clean Blockers From Panic Blockers
A handful of small habits separate the players who block cleanly from the ones who mash the input and pray. None of them are flashy, but each one removes a failure mode that you would otherwise hit during longer runs.
-
Keep your thumb on the block button between swings, not on the stick. The input travel matters when the timing window is 6 frames.
-
Watch the enemy's weapon, not its body. The body telegraphs often lie (animation cancels, feints), but the weapon tip or glowing palm follows the actual hitbox.
-
Stamina-check after every blocked heavy. If your bar is below a third, sidestep the next attack instead of blocking it.
-
Reset to mid-range after every blocked combo. Standing at point-blank after a block is how you eat a follow-up you did not see.
-
Treat the block as a combo tool, not a panic tool. The Emberville how to block question is really "how do I use block to extend my offense," and the answer is "by choosing when to block, not just whether."
Mistakes Worth Calling Out
The Emberville combat mistakes guide covers a longer list, but the blocking-specific ones come up often enough to flag here. The first is blocking during a screen-wide AoE telegraph, where the correct answer is to back off and only block as the wave passes through you, because holding block the entire duration drains your stamina before the hit lands. The second is trying to block a charging enemy that has not yet committed, which reads as a held-block pose and gets punished by a sidestepping enemy that simply walks around your guard.
The third mistake is treating every projectile as blockable. Some boss projectiles are flagged as Piercing and ignore block outright, so the right answer is a dash skill or a well-timed sidestep. The Emberville resistances guide is a useful companion for identifying which enemy attacks fall into the piercing category, because resistance data often hints at the block rules for a given family.
Putting It All Together
Once the timing, positioning, and combo habits are in place, blocking stops feeling like a separate mode of play and starts feeling like the rhythm underneath the two-button combat. A clean block should feel almost casual, because the decision was made two or three seconds earlier when you chose your distance and watched the telegraph. If the block input is still drawing your full attention, the fight is probably happening in the wrong distance band, and the fix is to reset to mid-range before you keep practicing.
The defensive side of Emberville is a small system on paper: one block button, one stamina bar, one chip damage table. In practice, it is the layer that lets you stay aggressive without trading hits, and the layer that lets you read the deeper Vitromotus encounters without burning through your healing charges. Treat the block as a combo tool first and a panic tool second, and the rest of the combat system starts to open up. The Emberville beginner guide is a good place to revisit if the broader pacing still feels rough, because blocking shines brightest when the rest of the build is in order.
Frequently Asked Questions
Does blocking cancel the enemy's combo string?
Yes, a clean block interrupts the attacker's current swing and resets their combo timer, which is why timed blocks are such a strong defensive answer against enemy strings. You still take chip damage and lose a chunk of stamina, so blocking is a trade rather than a free escape. Chain your own combo during the post-block window to make the trade worth it.
How do I tell the difference between a blockable hit and a guard break?
Guard break telegraphs glow a distinct color, play a louder audio cue, and usually come from a longer windup of about one second or more. The block input will visually trigger, but the hit will land as if you had not blocked at all, so the right answer is to sidestep or interrupt the windup with a fast combo. Treat the color glow as a hard "do not block" signal and reposition instead.
Can I block boss AoE waves safely?
You can, but you should only raise the block as the wave actually reaches you, not when the telegraph begins, because holding block through the entire animation will drain your stamina before impact. The better default is to sidestep the AoE and re-enter mid-range before the boss commits to its next swing. Reserve blocking for the final moment of an AoE rather than the windup.
Does weapon choice change how I should block?
Slower weapons like greatswords and axes have longer recovery, so their post-block windows are larger and reward heavier combo extensions. Faster weapons like daggers and rapiers recover quickly, which means the post-block window is shorter and the punish string is usually a quick light-light rather than a full three-hit chain. Match your block rhythm to the recovery time of whatever you are wielding.
Is there a way to practice blocking in a low-pressure environment?
Yes, the early Vitromotus floors and the prologue demo are designed around teaching the two-button combat system at a forgiving pace, so spend your first hour there blocking every enemy you meet before you start chaining combos. The Emberville beginner guide also flags several early encounters that are built specifically to drill the block timing without one-shotting you for missing it.