
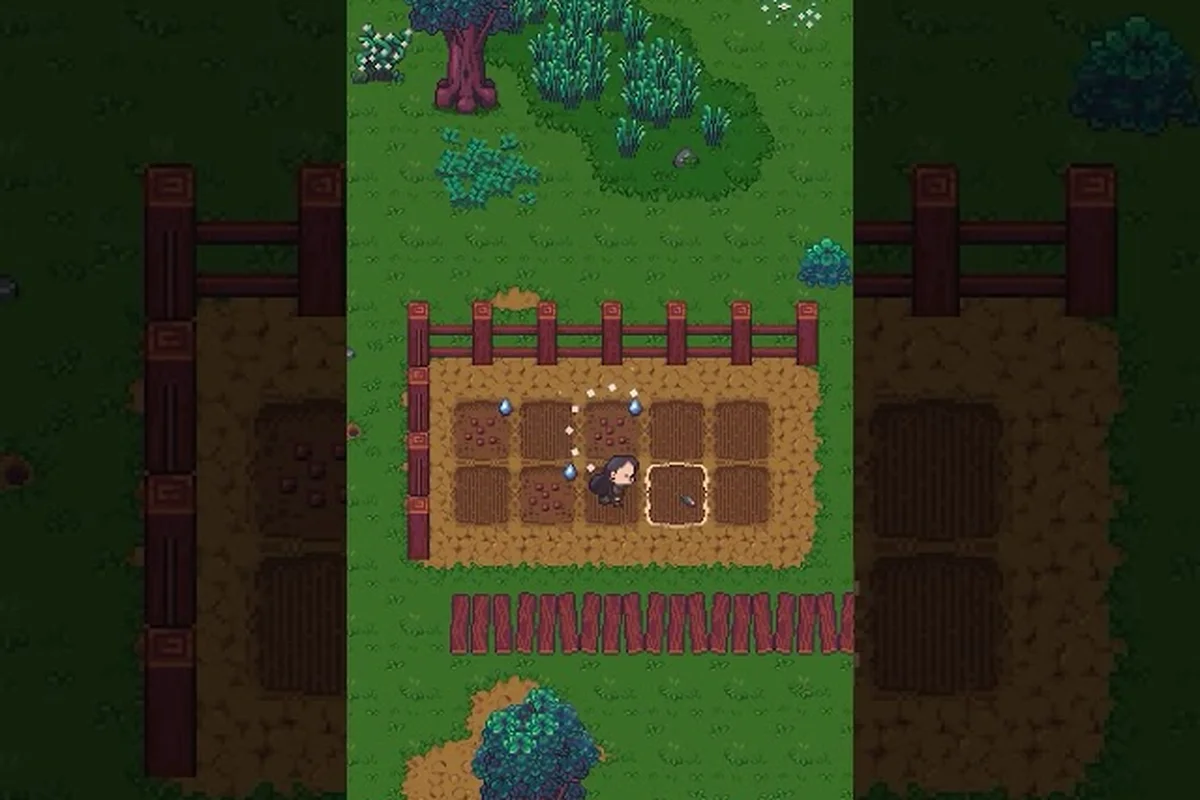
Farming in Emberville is the quiet backbone of every strong build, and learning Emberville how to grow crops the right way turns a half-empty pantry into a stream of stat boosts that carry you deep into the Vitromotus. Crops feed the cooking stations, cooking stations feed the potion brewers, and potion brewers feed the expeditions that unlock more seeds — a clean loop that, once you understand it, runs itself while you are off clearing dungeons.
This guide covers the full planting-to-meal pipeline: how to unlock the farm plot, which seeds to prioritize on day one, the harvest timing that maximizes yield, and the way the cooking and potion systems turn raw produce into the Emberville best food and most reliable buff consumables. You can also see the broader crafting backbone in the Emberville crafting materials guide, because farming only matters when the rest of your crafting bench is also fed.
Getting Started With the Farm Plot and Seed System
The farm is one of the earliest buildings you can place on your estate, and according to the Terminals entry, the estate is meant to host farms, crafting equipment, decorations, and more as you gradually rebuild the ruined town. The moment you clear the first homestead objective, the farm plot becomes available as a buildable structure, and the seed merchant NPC unlocks shortly after.
Unlocking the Farm and Buying Your First Seeds
You do not need to defeat any boss to unlock the farm. The trigger is the early story beat where you "settle the estate" for the first time, which opens the build menu. Once the plot is placed, talk to the seeds vendor inside the homestead hub. The vendor stocks a rotating selection that changes as you progress, so check back after every major story milestone.
| Seed Type | Unlock Condition | Best Season Slot | Notes |
|---|---|---|---|
| Turnip Seed | Available at homestead vendor from day one | Early spring | Fastest grow time, lowest yield, ideal starter |
| Carrot Seed | Vendor stock after first estate upgrade | Spring | Solid mid-tier yield, used in several basic recipes |
| Pumpkin Seed | Vendor stock after clearing Homestead Vault | Late summer | High yield, slow grow, key ingredient for feasts |
| Mushroom Spore | Found in damp Vitromotus rooms | Indoor plot only | Required for Emberville potion crafting recipes |
| Herb Seed | Unlocked via herbalist quest line | Any season | Foundation for the Emberville best food buff meals |
Each plot accepts one seed type at a time, and the same seed cannot be planted in a half-grown plot without paying a small gold forfeit to rip it out. Plan your plot layout before you commit, because swapping mid-growth burns gold you would rather keep for gear upgrades.
How Plots, Soil Quality, and Watering Work
Plots have three hidden stats that drive your harvest: Soil Quality, Water Level, and Compost Bonus. Soil Quality is fixed per plot tile and ranges from 1 to 5 stars, so always scout the homestead before placing the building — placing on a 5-star tile is the single biggest yield multiplier you control.
Watering is manual at the start. You fill a watering can at any well on the estate and click each plot once per in-game day. Miss a day and yield drops roughly 15%; miss three days in a row and the crop withers, returning only the seed with no harvest. Once you unlock the irrigation bench (a mid-game homestead upgrade), watering becomes automatic and the only thing you need to track is seasonal timing.
Emberville Planting Guide: Timing, Seasons, and Crop Rotation
The planting calendar in Emberville is forgiving but not infinite. Each in-game season lasts roughly six real-time minutes during a normal play session, and the homestead tracks its own micro-season independent of the Vitromotus weather. If you ignore seasons, you will still harvest — but yield bonuses and rare seed drops both gate behind seasonal alignment.
Seasonal Yield Modifiers
Crops planted in their preferred season get a flat 25% yield bonus and a small chance to produce a "perfect" harvest, which doubles the output of that single plant. Perfect harvests are the secret engine of the Emberville food guide economy because they are the only reliable source of high-tier cooking ingredients without paying the traveling merchant's premium.
| Crop | Preferred Season | Off-Season Penalty | Perfect Harvest Bonus |
|---|---|---|---|
| Turnip | Spring | -20% yield | Double produce, +1 seed back |
| Carrot | Spring | -20% yield | Double produce, +1 seed back |
| Pumpkin | Summer | -30% yield | Triple produce, +2 seeds back |
| Mushroom | Any (indoor) | None | Guaranteed double produce |
| Herb | Any | None | Adds 1 extra buff charge to meal |
Crop Rotation Strategy for Steady Output
Rotation is the difference between a feast and a famine. The simplest sustainable loop is a 3-plot rotation: two spring crops (turnip + carrot) and one summer crop (pumpkin). Plant turnip and carrot in plot A and B at the start of spring, then plant pumpkin in plot C at the start of summer. By the time pumpkin is ready, turnip and carrot are producing their second harvest.
If you unlock the greenhouse building (a late homestead upgrade that removes season penalties entirely), you can ignore the calendar and stack all plots with the highest-yield seeds. Until then, treat the seasonal chart above as a hard rule rather than a suggestion. The Emberville planting guide approach favored by veteran players is to plant in waves of three, never four — because four plots share a watering window that becomes tedious without the irrigation bench, and a single missed day on a four-plot farm can wipe out a full day of yield.
Emberville Cooking Guide: Turning Harvests Into Buff Meals
Cooking is where crops stop being food and start being combat power. The cooking station is unlocked alongside the farm in the early homestead tier, and every recipe you discover is permanently added to the station's recipe book. Recipes come from three sources: buying them from the homestead chef NPC, finding them as loot in the Vitromotus, and experimenting at the cooking station with two ingredients.
Core Recipes and Their Buff Payoff
The Emberville cooking guide loop has three tiers, and each tier feeds the next. Tier 1 recipes use only basic crops, Tier 2 recipes require a basic crop plus a foraged Vitromotus ingredient, and Tier 3 recipes require two cooked Tier 2 meals plus a rare catalyst.
| Meal | Tier | Ingredients | Buff | Duration |
|---|---|---|---|---|
| Hearty Stew | 1 | 2 Turnip, 1 Carrot | +15 HP, slow regen | 8 minutes |
| Carrot Cake | 1 | 3 Carrot, 1 Herb | +10% XP gain | 10 minutes |
| Pumpkin Roast | 2 | 2 Pumpkin, 1 Foraged Spice | +20 max stamina | 12 minutes |
| Mushroom Risotto | 2 | 2 Mushroom, 1 Cheese (Vitromotus drop) | +12% damage | 12 minutes |
| Hero's Feast | 3 | 1 Pumpkin Roast, 1 Mushroom Risotto, 1 Rare Herb | All Tier 2 buffs, +5% crit | 15 minutes |
The Hero's Feast is widely considered the Emberville best food option for boss runs because it stacks every combat-relevant buff at once. The catch is that it eats your Tier 2 meal output, so the farming pace has to support at least 6 Pumpkin and 6 Mushroom harvests per feast batch. If you want a more relaxed farming pace that still supports the Hero's Feast, the Emberville tools crafting guide shows the trinket economy that converts surplus gold into ingredient vouchers at the homestead vendor.
Cooking Station Upgrades That Matter
There are three cooking station upgrades, and only two of them are worth prioritizing. The first upgrade adds a second cooking slot, which is essential for batch cooking. The second upgrade adds the "Chef's Intuition" passive, which gives a 30% chance to produce a bonus meal whenever you cook. The third upgrade adds a visual theme and is purely cosmetic.
If you are wondering how to make the cooking station output feed smoothly into Emberville potion crafting, the answer is the meal deconstructor. Unlocked at homestead tier 4, the meal deconstructor breaks any cooked meal back into its component ingredients at a 60% return rate, which is a useful safety valve when you accidentally overcook a recipe you don't need.
Emberville Best Food and Potion Crafting Pipeline
Potions in Emberville are the most efficient source of repeatable stat buffs, and the Emberville potion crafting system is designed to consume crops that cooking can't use efficiently. The potion bench is the only crafting station that accepts raw crops, cooked meals, and foraged reagents in the same recipe, which is why farming scale matters more for brewers than for chefs.
Emberville How to Make Potions From Scratch
The Emberville how to make potions workflow has four steps. Step one is planting the right crop mix — at minimum two mushroom plots and one herb plot. Step two is harvesting and storing the raw ingredients in the homestead chest. Step three is unlocking the basic potion recipe at the alchemy vendor, which costs 200 gold and 5 herbs.
| Potion | Recipe | Buff | Compared to Cooking Equivalent |
|---|---|---|---|
| Minor Healing Draught | 2 Herb, 1 Mushroom | +30 HP instant | Faster than any meal, but no regen |
| Stamina Tonic | 3 Carrot, 1 Herb | Restore 50% stamina | Better value than Pumpkin Roast for sustained fights |
| Toxin Vial | 2 Mushroom, 1 Foraged Venom | +15% poison damage, 5 min | No cooking equivalent, unique to alchemy |
| Elixir of Vigor | 1 Stamina Tonic, 1 Hearty Stew, 1 Rare Mushroom | +25% all stats, 10 min | Outperforms Hero's Feast on a per-minute basis |
The Elixir of Vigor is the late-game workhorse, and it is also the strongest argument for running both a cooking station and a potion bench. It consumes a cooked meal, which means every Elixir of Vigor you brew pulls double duty: it spends crops you already grew, and it converts low-tier ingredients into a high-tier buff that no other crafting path can match.
Alchemy Bench Upgrades and the Brew Queue System
The alchemy bench has four upgrades, and three of them are worth chasing. The first upgrade unlocks the brew queue, which lets you line up to three potions in sequence while you go dungeoneering. The second upgrade adds the "Master Brewer" passive, which gives a 20% chance to brew a bonus potion on any successful craft. The third upgrade adds ingredient auto-restock from the homestead chest, which removes the most tedious part of the loop. The fourth upgrade is cosmetic.
Once the brew queue is online, the entire Emberville potion crafting loop becomes background work. You load the queue with two Elixir of Vigor recipes and one Minor Healing Draught, hit start, and head into the Vitromotus. By the time you return, the bench has converted your harvested crops into a stack of combat-ready consumables.
Frequently Asked Questions
What is the fastest crop to grow in Emberville?
Turnip is the fastest crop, with a full grow cycle of roughly 90 seconds per in-game day. It is the best seed for learning the farm timing loop because you can plant, harvest, and replant within a single play session, which makes it ideal for new homestead managers who are still figuring out the watering and seasonal systems.
How do I unlock the alchemy bench for Emberville potion crafting?
The alchemy bench unlocks at homestead tier 3, which requires you to clear the first two Vitromotus boss rooms and complete the herbalist quest line. Once unlocked, the bench is placed like any other estate building, and the basic Minor Healing Draught recipe becomes available from the alchemy vendor for 200 gold and 5 herbs.
Is the Hero's Feast really the Emberville best food option?
For boss runs, yes. The Hero's Feast stacks every Tier 2 buff plus a 5% crit bonus for 15 minutes, and no other meal comes close on raw stat value. For general exploration, the Pumpkin Roast is a better choice because it is cheaper to produce and only sacrifices the crit bonus, which matters less against trash mobs.
Can I automate watering without the irrigation bench?
Not fully. The homestead pet system includes a small "Garden Helper" companion that auto-waters one plot per in-game day, but the rest still requires manual watering. Once you build the irrigation bench, all plots become fully automated, so prioritize that upgrade as soon as it becomes available at homestead tier 2.
What should I do with surplus perfect harvests?
Save them. Perfect harvests are the only reliable source of high-tier cooking catalysts, and once you unlock the Hero's Feast recipe, every perfect harvest you have stockpiled becomes a free feast batch. Selling them to the traveling merchant is a short-term gold win but a long-term crafting loss, especially if you plan to push into the late-game Vitromotus bosses.