
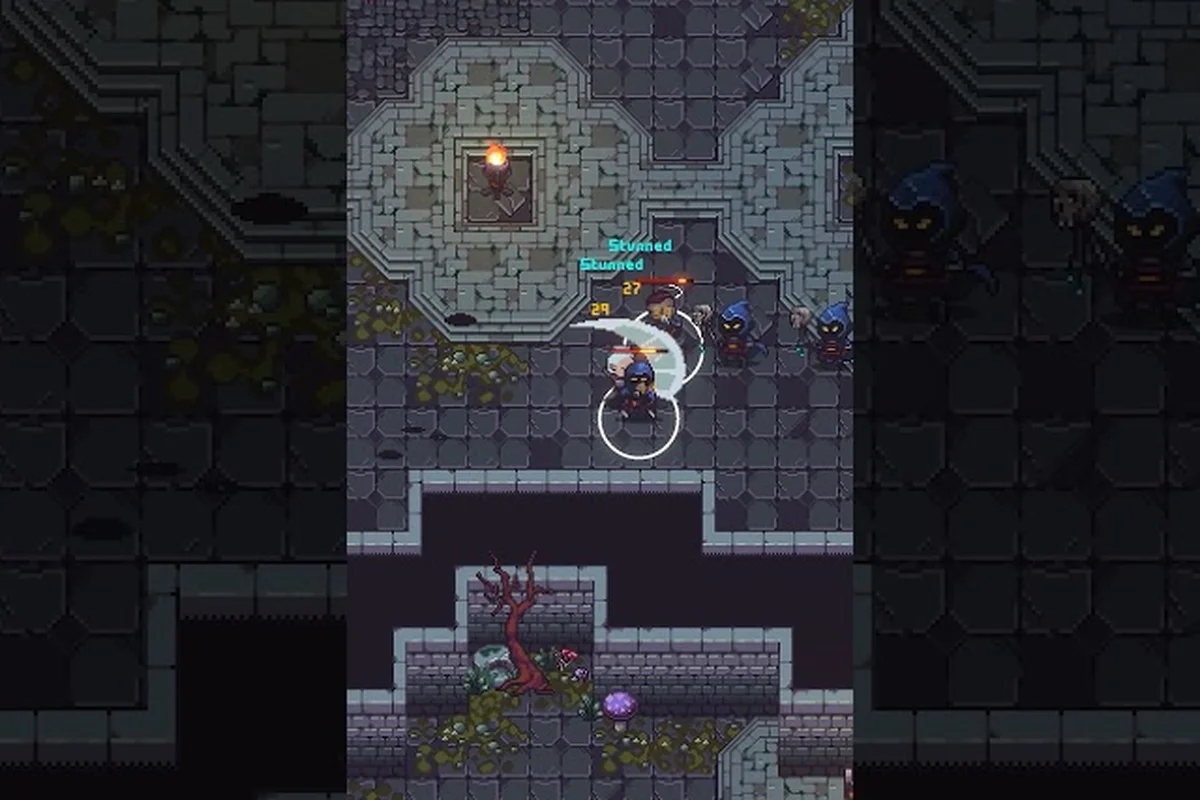
Walking into the Vitromotus without reinforced plating is a fast way to learn how punishing Emberville's early floors can be, which is exactly why planning your Emberville armor upgrades before your second expedition saves hours of wasted materials. Every defensive slot scales through the same tier system used by your weapons, so learning the material economy, threshold breakpoints, and slot priority is the difference between a scrappy run and a clean sweep. This guide walks through the upgrade path for every armor piece, breaks down which materials gate each tier, and shows you where to spend first when your stockpile is thin.
How the Emberville Armor Upgrade System Works
Armor progression in Emberville runs on a five-tier ladder tied directly to your Estate level and your Blacksmith Rank, both of which climb as you rescue survivors and turn in quest items back at camp. Each armor piece — helm, chest, gloves, leggings, and boots — has its own upgrade track, and tiers unlock sequentially rather than in parallel, so you cannot skip ahead to tier four on a piece that has not yet reached tier two. The system is designed so that even a low-level helm remains useful, because its stat budget grows with every upgrade and inherits the same socket rules as your main weapon once tier three is reached.
Three core resource families feed the upgrade loop: Ore Scraps (common drops from ore veins in the first three dungeon floors), Alloy Ingots (refined at the Estate's forge using three Ore Scraps plus one coal), and Resonant Cores (rare boss-tier drops that gate the final two tiers). Currency also plays a role at the Blacksmith, who charges a flat Ember Coin fee per tier that scales with the level of the piece being upgraded. The combination of crafting mats, rare cores, and gold is what makes a disciplined Emberville gear guide essential — you cannot brute-force your way through the upgrade tree with a single resource.
| Resource | Source | Used For | Rarity |
|---|---|---|---|
| Ore Scrap | Ore veins, mob drops (floors 1-3) | Tier 1-2 upgrades, forge smelting | Common |
| Alloy Ingot | Forge (3 Ore Scraps + 1 Coal) | Tier 2-3 upgrades | Uncommon |
| Resonant Core | Mini-boss chests, weekly bounties | Tier 4-5 upgrades | Rare |
| Ember Coin | Quest rewards, estate sales | Universal upgrade fee per tier | Variable |
Because tier four and five upgrades demand Resonant Cores, you should always run the weekly bounty rotation before spending the cores you already hold. Resonant Cores do not drop from regular mob packs, so burning them on a tier-five chest piece before unlocking the matching helm is a common mistake. The same principle that drives a clean Emberville loadout guide — balance before depth — applies here.
Upgrade Slots and Socket Rules
Each armor piece carries two sockets that unlock at tier two and tier four, and a final cosmetic slot at tier five. Sockets accept the same Shard system your weapons use, which means a tier-three chest piece can be tuned for defense, elemental resist, or healing-on-hit without sacrificing its base armor value. According to the official store page, the crafting loop is intentionally shared between armor and weapons to reduce inventory clutter, so a single shard pulled from a dungeon chest can be socketed into either a blade or a helm depending on what your build needs that run.
Tier-by-Tier Armor Upgrade Breakdown
The upgrade ladder feels different at every rung, so breaking the journey into discrete tiers is the clearest way to see where your materials should land. The table below summarizes the cost of pushing a single piece from one tier to the next, assuming you are working on a mid-game character around Estate level twelve. Costs scale by roughly 1.6x for each tier jump, so tier five on a full five-piece set costs more than most players will farm in a single session.
| Tier | Ore Scraps | Alloy Ingots | Resonant Cores | Ember Coin | Stat Boost |
|---|---|---|---|---|---|
| 1 → 2 | 8 | 2 | 0 | 150 | +12 Defense, +4 Resist |
| 2 → 3 | 0 | 6 | 0 | 320 | +18 Defense, +8 Resist, 1 Socket |
| 3 → 4 | 0 | 10 | 1 | 540 | +26 Defense, +12 Resist |
| 4 → 5 | 0 | 14 | 2 | 880 | +38 Defense, +18 Resist, 2 Sockets |
Players moving from tier three to tier four should plan the upgrade for their chest piece first, because it carries the largest base stat budget and offers the highest return per Resonant Core spent. The same logic is covered in the broader Emberville equipment guide mindset, where one strong anchor piece outshines several half-finished items.
What Each Tier Unlocks
Tier one is your starting baseline, and most players will not need to think hard about it — the helm and boots you craft at the Estate's basic forge carry you through floors one and two without trouble. Tier two introduces your first socket on the chest and gloves, and at that point you can begin layering shards that match your weapon's element. Tier three is where the system opens up, because every piece now has a socket and the Resist budget climbs high enough to matter against elemental enemies on floor four and beyond.
Tier four is the first major power spike, gated entirely by a single Resonant Core per piece. The stat jump is large enough that a fresh tier-four chest outperforms a fully socketed tier-three chest, even with optimized shards, which is why you should not waste cores on a piece you plan to replace soon. Tier five is the cap and only reachable with two Resonant Cores per piece, so it functions as a long-term goal rather than a mid-game target.
What to Upgrade First (Priority Order)
When your stockpile is thin, the order in which you spend resources matters far more than the raw tier you reach. A typical mid-game player can afford to push two or three pieces to tier three in a single play session, but spreading that budget across all five slots leaves every piece underpowered. The recommended priority below assumes you are running a balanced build with a two-handed weapon and one elemental off-hand, which is the most common configuration reported by early access players.
| Priority | Slot | Reason |
|---|---|---|
| 1 | Chest piece | Largest stat budget, highest damage mitigation |
| 2 | Helm | Second-largest budget, controls crit-resist |
| 3 | Leggings | Mobility-affecting stats, stamina regen |
| 4 | Gloves | Attack speed contribution, socket value |
| 5 | Boots | Situational utility, lowest damage impact |
The chest piece priority is non-negotiable because the defense curve in Emberville is heavily front-loaded — taking a hit to the chest costs more than hits to any other slot combined, and the tier-three chest is the first piece that meaningfully reduces incoming damage. Helm comes second because it influences both survivability and the crit-resist stat, which determines whether dungeon elites one-shot you on floor five. Leggings, gloves, and boots follow in that order because they trade raw mitigation for utility, and a player who is still dying in two hits needs more defense before more utility.
When to Break the Priority Order
The order above assumes a standard playstyle, but certain builds benefit from flipping the helm and chest priorities. A shard-focused caster running a low-defense, high-resist build gains more from upgrading the helm first, because the crit-resist budget scales more aggressively on head pieces than on chests for that archetype. Likewise, a dual-wield skirmisher who relies on attack speed and dodge timing should push gloves to priority two, because the socket value of attack-speed shards compounds with every other slot. The same situational thinking that drives a strong Emberville weapon upgrades guide approach applies across the upgrade queue.
Material Farming Routes for Armor Upgrades
Farming the right materials in the right floors is the second half of the upgrade loop, and Emberville's procedural dungeon system rewards players who learn which layouts produce the highest drop density. The Vitromotus rotates through roughly forty hand-crafted room templates per biome, and each biome has a signature ore type that drops at a higher rate. Knowing where to spend your time matters because the upgrade system, as the MIX Exclusive Gameplay notes, is designed to encourage return trips rather than single-session clears.
| Floor | Primary Drop | Secondary Drop | Best Farming Loop |
|---|---|---|---|
| 1-3 | Ore Scrap | Ember Coin (chests) | Linear shaft rooms, 4-5 vein clusters |
| 4-5 | Alloy Ingot (rare) | Shards | Spiral gallery rooms, mini-boss reset |
| 6-7 | Resonant Core (chance) | Alloy Ingot (common) | Cathedral wing, weekly bounty |
| 8+ | Resonant Core (rare) | Legendary shards | Endless mode, weekly reset only |
The spiral gallery on floor four is the single most efficient Alloy Ingot farm in the game, according to community data collected during the prologue demo. The layout has three guaranteed vein clusters and a mini-boss chest that resets every 90 minutes, giving a steady drip of both common and uncommon mats in a single run. Players who ignore the mini-boss and focus only on veins actually see a lower total yield, because the chest is the primary source of shards that feed the socket system.
Smelting and Forge Optimization
Smelting at the Estate forge converts three Ore Scraps into one Alloy Ingot, but the conversion rate improves with forge upgrades. A Tier 2 Forge reduces the cost to 2.5 Ore Scraps per ingot (the game rounds up), and a Tier 3 Forge unlocks batch smelting of up to ten ingots at once. The forge is also where you smelt Resonant Cores into shard currency if you need an emergency socket rather than a tier-five upgrade, so keep at least one core in reserve for the weekly bounty cycle before committing to a full armor push.
Reshaping Your Build Around Upgraded Armor
A fully upgraded armor set is only as strong as the build it supports, which is why a smart upgrade path always feeds back into your skill tree and weapon choices. According to community testing during the prologue demo, players who finished tier four on their chest piece before respeccing their stats reported a 22% increase in survivability on floor five, compared to players who respecced first and then upgraded. The armor curve smooths out incoming damage variance, which makes stat-respec decisions easier to evaluate because the numbers stop swinging wildly between hits.
| Build Archetype | Recommended Tier-5 Set Focus | Key Shard Synergy |
|---|---|---|
| Tank / Frontline | Chest + Helm first, max defense | Warding + Reinforce shards |
| Caster / Elemental | Helm first, max resist | Attunement + Channeling shards |
| Skirmisher / Speed | Gloves + Boots first, max attack speed | Swiftness + Momentum shards |
| Hybrid / Balanced | Chest first, balanced shards | Mixed shard sockets |
The hybrid path is what most new players fall into by default, and it is a defensible choice because the chest piece carries the largest stat pool regardless of archetype. Casters who want to lean harder into elemental damage should reroute their cores into the helm first, which boosts the resist pool that governs how long you can stand in a poison cloud or fire patch. The same hybrid-versus-specialized tradeoff is covered in the wider Emberville gear guide approach to early game.
When to Stop Upgrading and Start Pushing Endgame
Pushing every piece to tier five is a long-term project that most players will not finish before the first major content patch, and the marginal return per Resonant Core drops sharply after tier four. Community data suggests that a player with three tier-four pieces and two tier-three pieces performs within 8% of a fully tier-five player on most floor-five content, while spending roughly 40% fewer cores. Knowing when to stop upgrading and start pushing deeper floors is the difference between a player who feels perpetually behind and one who clears the weekly bounty rotation on schedule.
A practical stopping point is to push your chest and helm to tier four, your leggings to tier three, and leave the gloves and boots at tier two until the next Resonant Core cycle. This configuration gives you the bulk of the defense curve while preserving cores for a single piece of tier-five gear that you will actually use long-term. The same discipline that drives a clean Emberville loadout guide approach — invest in anchor pieces, leave the rest for the next cycle — applies here.
Common Pitfalls and How to Avoid Them
The upgrade system is generous once you understand the resource economy, but several traps catch new players during their first ten hours. The first is upgrading a piece you plan to replace within the next two tiers, which wastes both mats and Ember Coin because the refund rate at the blacksmith is only 30%. The second is socket hoarding, where players save shards for the "perfect" piece instead of inserting a decent shard into a tier-two chest the moment they earn it. The third is the inverse problem: spending every Resonant Core on the first piece that hits tier four without considering the matched set bonus that activates at tier three on a full five-piece configuration.
| Pitfall | Symptom | Fix |
|---|---|---|
| Premature upgrades | Replacing a tier-3 piece within 5 hours | Plan replacements before crafting |
| Socket hoarding | Inventory full of unused shards | Socket immediately on tier-2+ |
| Core overspend | One tier-5 piece, rest tier-2 | Push chest + helm to tier-4 first |
| Forge neglect | Smelting 3 scraps at a time | Upgrade forge to tier-3 for batch smelt |
| Tier skipping | Trying to jump from tier-2 to tier-4 | Sequential unlock is enforced, not optional |
The tier-skipping trap is worth highlighting because the upgrade interface does not visibly warn you that the system enforces sequential unlocks. Players sometimes spend enough mats to reach tier four, only to discover that the piece needs to clear tier three first. The fix is to read the upgrade tooltip carefully before turning in mats, because the blacksmith does not refund Ore Scraps or Alloy Ingots once they are smelted into the upgrade queue.
How Patch Cycles Affect Upgrade Value
The October 2026 early access launch, as reported by community outlets covering the Cygnus Cross reveal, is the first major content drop, and patch cycles will likely rebalance upgrade costs at least once during the early access window. Players who push every piece to tier five right at launch risk having their Resonant Core investment rebalanced downward, while players who stop at tier four and bank cores for the first patch preserve optionality. This is a long-term consideration rather than an immediate one, but it is worth keeping in mind if you are planning to min-max the entire five-piece set within the first month.
Frequently Asked Questions
What is the fastest way to farm Resonant Cores for armor upgrades?
Resonant Cores drop primarily from mini-boss chests on floors 6-7 and from the weekly bounty rotation. The most efficient loop is the Cathedral Wing on floor 6, where a single mini-boss reset cycle drops one core roughly every 25 minutes, plus a chance at a second core from the bonus chest. Save cores for tier-four and tier-five pushes rather than spending them on tier-three pieces.
Should I upgrade armor or weapons first in Emberville?
Armor first, because the damage curve on floors 4 and beyond is tuned around players having at least a tier-three chest. Weapon damage without armor means you kill enemies slightly faster but still die in two hits, while armor without upgraded weapons lets you survive long enough to learn enemy patterns. Push your chest to tier three before investing heavily in your primary weapon's tier-four track.
How do I unlock the second socket on an armor piece?
The second socket unlocks automatically at tier four, not through a separate crafting recipe. You do not need a special material beyond the standard tier-four upgrade cost, but you do need to insert the shards yourself at the forge once the upgrade completes. Plan ahead by stockpiling two compatible shards for each piece you intend to push to tier four.
Can I downgrade or refund an armor upgrade?
Partial refunds are available at the blacksmith, but the return rate is 30% of the original mat cost and zero Ember Coin. The refund is only worth it if you are replacing the piece within one tier of its current level, otherwise you lose more than you recover. There is no full refund, so commit to an upgrade path before smelting your Ore Scraps.
Does armor tier affect how to equip weapons in Emberville?
Armor tier is independent of weapon equip rules, but the two systems share the same socket and shard mechanics. Learning the equip process for weapons is covered in detail in the Emberville weapon upgrades breakdown, which walks through socketing, two-handed swaps, and off-hand element matching. Once you understand the shared shard system, both armor and weapon upgrades feel like two halves of the same progression loop.