
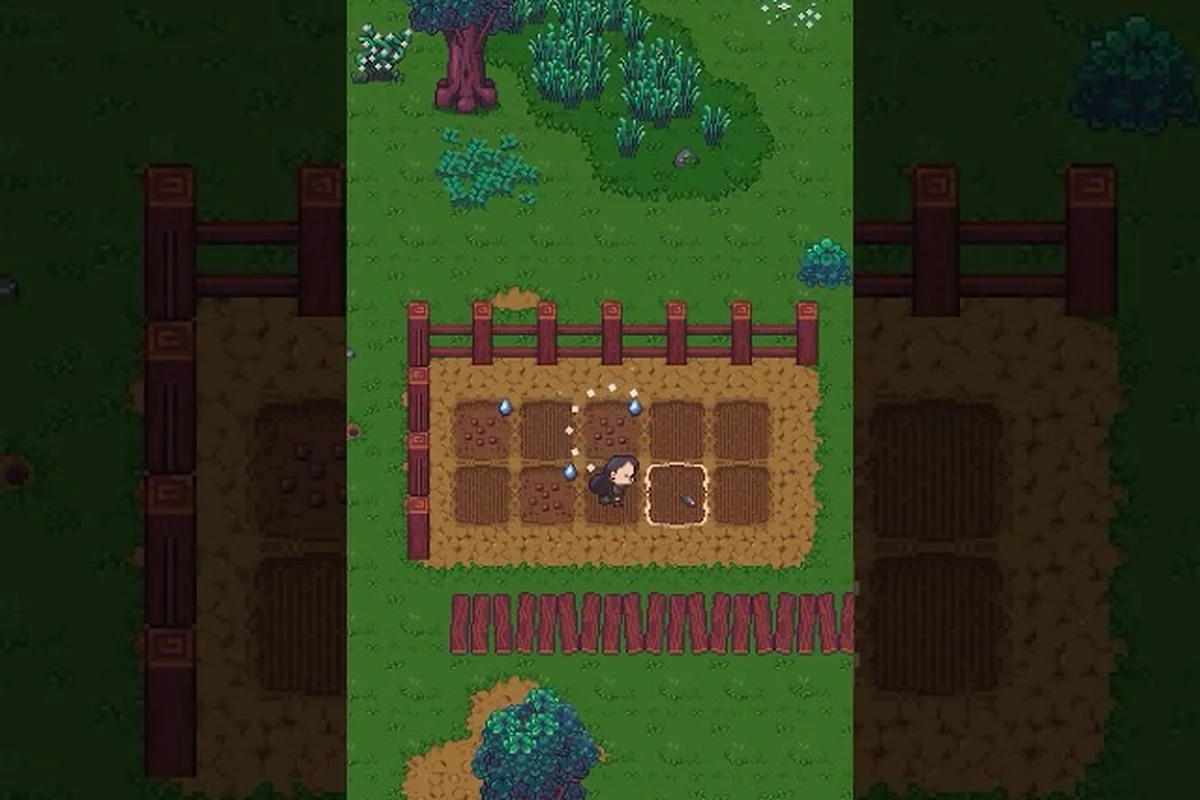
A great Emberville farm layout is less about decoration and more about how plots, buildings, and upgrade paths connect to the production loop. Players who treat farming as a standalone minigame stall their own progress, because in practice the farm feeds cooking, cooking fuels expeditions, and expeditions fund the next round of estate upgrades. This guide walks through how to read plot tiers, where to place each building, and which Emberville estate upgrades to chase first so crops, buffs, and crafting flow in one continuous cycle rather than fighting over the same small patch of land.
Reading the Farm Plot System Before You Build
Farming in Emberville starts with the same constraint every player hits: the initial plot is too small for the number of seeds you actually want running. The farm plot grows as you rescue villagers and unlock estate tiers, so the layout you build on day one is a placeholder, not a final shape. According to the official Discord server, the estate is a placement sandbox for buildings, decorations, farms, crafting equipment, and more, which means the farm is one node inside a larger settlement blueprint rather than its own island.
Plot Tiers and Unlock Conditions
Each plot tier opens new bed counts, water access, and adjacency bonuses. Players who skip straight to the highest tier without finishing earlier tiers usually lose out on the small stacking bonuses that make mid-game cooking viable.
| Plot Tier | Typical Unlock | Adjacency Bonus | Best Early Use |
|---|---|---|---|
| Tier 1 (Starter) | Default at first rescue | None | Quick-grow herbs, starter onions |
| Tier 2 (Expanded) | Rescue 3 villagers, 500 gold | +5% yield near water | Staple grains, root vegetables |
| Tier 3 (Fertile) | Town upgrade: Mill foundation | +10% yield with sprinklers | Multi-season crops, bulk wheat |
| Tier 4 (Grand) | Estate upgrade: Greenhouse | +15% yield year-round | Rare ingredients, buff meals |
Season and Water Mechanics
Seasons rotate the available seed list, while water tiles (a well, a stream tile, or a sprinkler) raise yield on adjacent beds. The mistake most new players make is clustering all high-value crops on the same fertile tile, which starves the rotation. A balanced Emberville farm layout spaces water access so every season has at least one bed of staple crop and one bed of seasonal specialty, keeping the cooking pipeline fed even when a season shift wipes out the most profitable seed.
The Core Farm Layout: Zones, Paths, and Adjacency
Once plot tiers are clear, the layout itself becomes a geometry problem. Three zones tend to dominate a healthy farm: a planting zone, a processing zone, and a storage zone. Connecting them with clear paths cuts the number of clicks per cycle and prevents the "where did I drop the seed" problem that slows down every run.
The Three-Zone Grid
A clean Emberville estate layout uses the same idea the broader estate design guide recommends: put noisy production buildings away from the residential core, and route paths around the perimeter so villagers can walk without crossing your planting rows.
| Zone | Buildings | Placement Rule |
|---|---|---|
| Planting | Farm plots, sprinklers, scarecrows | South side for sun, near water |
| Processing | Mill, kitchen, composter | Adjacent to planting, one tile gap |
| Storage | Chests, cellar, seed box | Behind processing, near estate exit |
Path Width and Move-Lanes
Paths should be at least two tiles wide. A single-tile path looks tidy but constantly blocks movement when two workers try to cross, which leads to dropped interactions mid-recipe. Most community-tested layouts leave one open "move lane" that loops the entire farm so you can run the loop without colliding with planting rows. This is the same move-lane habit that the deeper estate guide describes for crafting hubs, and it scales: when you unlock the greenhouse, the lane simply extends.
Best Buildings for a Farm Layout and How to Unlock Them
A farm is only as strong as the buildings feeding it. The Emberville building list relevant to farming splits into three categories: production (mill, kitchen), infrastructure (sprinklers, scarecrows, composters), and support (chests, signage, decorative lighting). The unlock chain usually runs through town upgrades, so farm buildings and town upgrades share the same resource pool.
Production Buildings Worth Chasing First
| Building | Primary Output | Unlock Trigger | Priority |
|---|---|---|---|
| Mill | Flour from grain | Town upgrade tier 2 | High |
| Kitchen | Cooked meals, buff food | Town upgrade tier 2 | High |
| Composter | Fertilizer from scraps | Estate upgrade tier 1 | Medium |
| Seed Press | Seed duplication, rare seeds | Estate upgrade tier 3 | High |
| Greenhouse | Year-round planting | Estate upgrade tier 4 | Late |
Infrastructure That Pays for Itself
Sprinklers and scarecrows are the quiet workhorses of any farm. Sprinklers cut watering time and stack with the fertility bonus on adjacent plots, so placing a sprinkler at the intersection of four beds is one of the highest-value tile decisions in the whole layout. Scarecrows reduce crop loss from random events, which matters more in deeper seasons when event frequency rises. Players who skip scarecrows in favor of pure decoration usually lose 10-15% of yield by mid-game, according to community data reported by players on the Terminals coverage of the estate loop.
Estate Upgrades and the Building Upgrade Chain
Emberville estate upgrades and Emberville building upgrades are linked, but they are not the same thing. Estate upgrades raise the cap on how many buildings you can place and which tiers are available. Building upgrades raise the output of a specific structure, like turning a basic mill into an enchanted mill that processes two batches per cycle. Knowing which is which keeps you from burning gold on the wrong tier.
Upgrade Priority by Player Phase
| Phase | Estate Upgrade | Building Upgrade | Reason |
|---|---|---|---|
| Hours 1-10 | Plot expansion tier 2 | Mill tier 1 | Bulk staple crops |
| Hours 10-25 | Resident slot +3 | Kitchen tier 1, Composter | Buff meals for expeditions |
| Hours 25-50 | Greenhouse foundation | Mill tier 2, Seed Press | Year-round rare ingredients |
| Hours 50+ | Grand estate tier | All buildings tier 3 | Self-sustaining production |
The Class-Town Synergy You Should Not Ignore
Estate upgrades that unlock buildings also tend to gate class-specific vendors, so a stalled farm layout can quietly block your class progression. The Emberville class guide covers which classes need which townsfolk, but the short version is this: a Knight/Warrior build needs a steady supply of ironroot and grain for buff meals, and those ingredients only flow when the mill and kitchen are both upgraded. If you want to know how to unlock buildings faster, the answer is almost always to push villager rescues, because every rescued villager adds a new quest that funds an estate upgrade.
Cooking, Buffs, and the Year-Round Pipeline
The reason a farm layout matters more than it looks is that cooking consumes the same tiles the farm uses. A well-designed Emberville farm layout treats the kitchen as the endpoint of the planting zone, not a separate building. When seeds turn into ingredients, ingredients turn into buff meals, and buff meals fuel deeper Vitromotus runs, the entire settlement economy becomes a single loop.
The Staple-to-Specialty Rotation
Staples (wheat, root vegetables, common herbs) grow fast and form the base of every recipe. Specialties (rare mushrooms, seasonal fruit, enchanted crops) grow slowly but feed the high-tier buff meals that make boss fights survivable. Most community-tested layouts run a 70/30 split: 70% of beds on staples, 30% on specialties, rotating each season so a wiped specialty never breaks the pipeline. The detailed cooking and meal pipeline lives in a separate breakdown, but the layout-side rule is simple: never let a specialty tile sit fallow when a staple could fill it.
Buff Meals Worth Building the Farm Around
| Buff Meal | Core Ingredient | Farm Demand | Expedition Value |
|---|---|---|---|
| Ironroot Stew | Ironroot, grain | High | +Defense for early bosses |
| Spiced Cider | Apple, sugar | Medium | +Stamina regen, long runs |
| Mushroom Ragout | Rare mushroom, herb | High | +Damage vs undead, mid-game |
| Honeyed Toast | Wheat, honey | Low | +XP gain, leveling routes |
Advanced Layout Tactics: Multi-Season and Greenhouse Play
Once the basic farm runs, the next layer is multi-season planning. The seasonal system means a crop that thrives in spring may be a liability in winter, so the layout has to absorb rotation without forcing a full rebuild. This is where the greenhouse changes the math: it creates a year-round tile that ignores season shifts, which lets the rest of the farm rotate freely.
The Greenhouse Anchor Pattern
Place the greenhouse at the corner of the planting zone, not in the middle. Corner placement gives the greenhouse two exterior walls (which is where rare-crop adjacency bonuses trigger) and keeps it from blocking the move-lane. Inside the greenhouse, run specialty crops that are too valuable to lose in a season wipe. Outside, rotate staples to match the current season. The Terminals Emberville publisher page describes the estate as a place where you "rescue the citizens of Emberville and help them rebuild their town," which lines up with how the greenhouse acts as a stabilizer for the wider settlement loop.
Farm Layout Errors That Waste Space
-
Stuffing every tile with sprinklers. A dense sprinkler grid looks efficient but blocks replanting. Two sprinklers per four-bed cluster is the sweet spot.
-
Putting the kitchen on the opposite side of the estate from the farm. Every step between farm and kitchen is wasted time. Keep them adjacent.
-
Ignoring the seed box placement. The seed box is the building you interact with most. Place it on the path between farm and storage, not buried in a corner.
-
Chasing decoration before production. Decorations matter for morale, but a fully decorated farm with no upgraded mill is a money pit.
Frequently Asked Questions
What is the best early Emberville farm layout for new players?
Run a small three-zone grid: four planting beds in the south, a mill and kitchen on the east side, and two chests on the west. This Emberville farm layout costs almost nothing, uses the starter plot, and lets you replant without bumping into processing buildings. Add a sprinkler at the corner of the four beds once you unlock infrastructure, then expand the planting zone as plot tiers open.
How do you unlock more buildings in Emberville?
Most farm-related buildings unlock through town upgrades, which themselves trigger when you rescue villagers and complete their quest chains. The fastest way to learn how to unlock buildings is to clear early Vitromotus floors and bring survivors back, because each rescued villager adds a quest that funds an Emberville building upgrade. The mill and kitchen typically unlock at town tier 2, while the seed press and greenhouse need estate tier 3 and 4.
Which Emberville estate upgrades should I prioritize first?
Expand plot tier 2 first, then unlock the mill and kitchen, then push toward the greenhouse foundation. Plot expansion increases yield ceiling, the mill and kitchen convert crops into buff meals that fuel deeper runs, and the greenhouse stabilizes the rotation. Skip pure decoration upgrades until production buildings are maxed, because cosmetic bonuses rarely beat a +15% year-round yield from the greenhouse.
What are the best buildings for a farm-focused estate layout?
Mill, kitchen, composter, seed press, and greenhouse form the core of a farm-focused estate. The mill turns grain into flour, the kitchen turns ingredients into buff meals, the composter recycles scraps into fertilizer, the seed press duplicates rare seeds, and the greenhouse extends the planting season. A scarecrow on each planting cluster is a strong addition once event frequency rises in the mid-game.
Can the farm layout change later without losing progress?
Yes. Beds and buildings can be moved and re-placed as long as you have the gold for the placement fee, and crops in transit go to storage instead of being lost. The exception is in-progress recipes in the kitchen, which finish in place. Plan major reshuffles around the in-game day cycle so you are not interrupting a long cook when you tear up the floor plan.